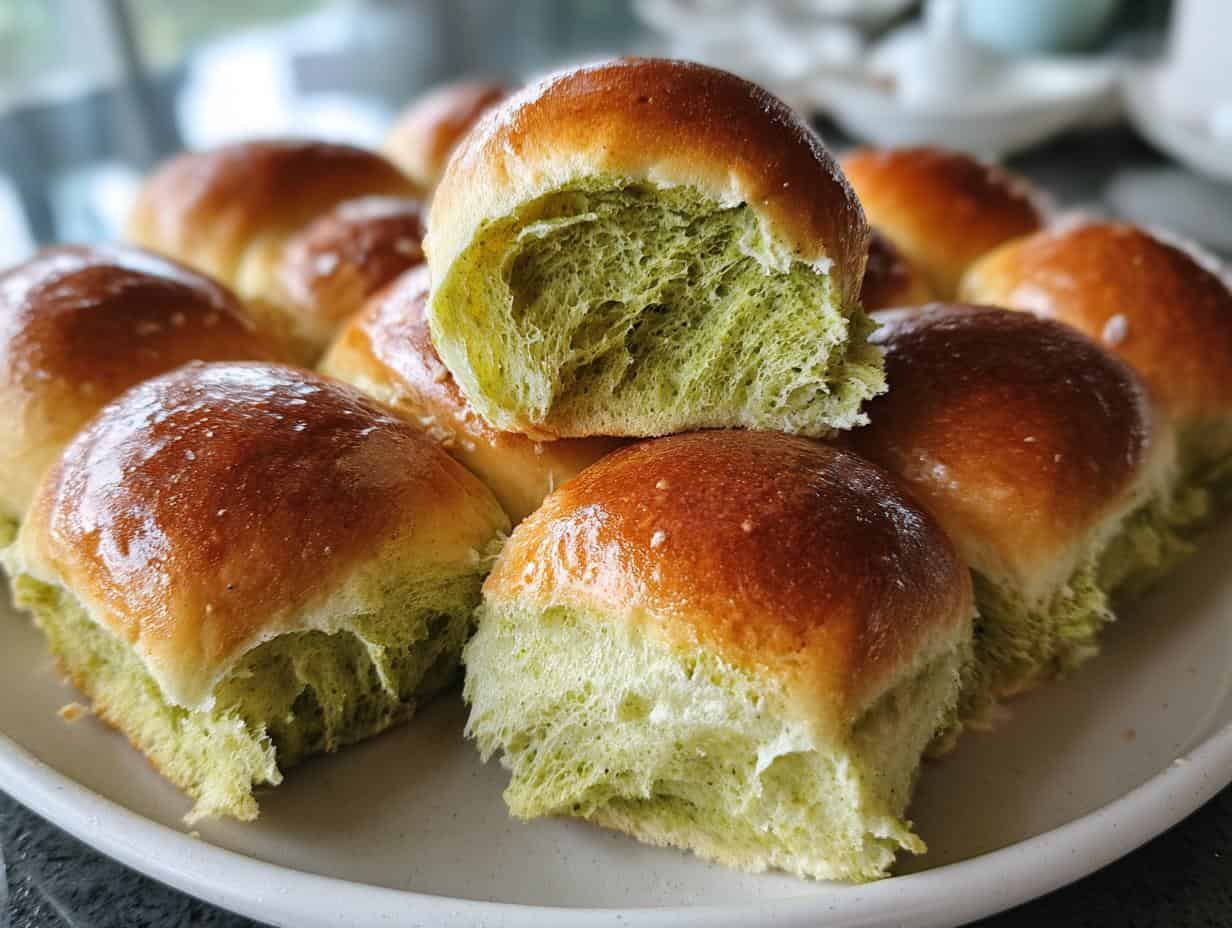
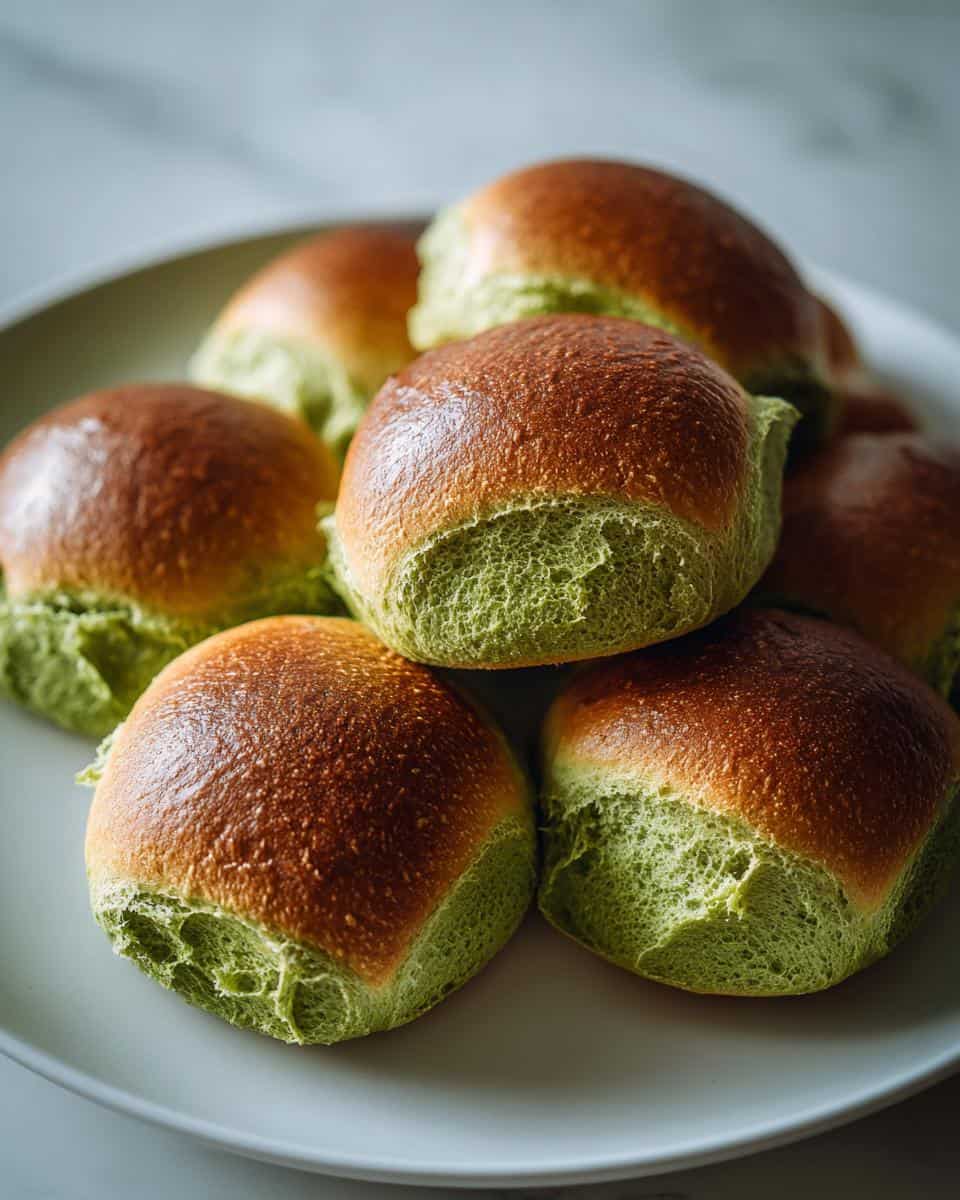
I’ll never forget the first time I tried matcha pan at a tiny bakery in Kyoto – that perfect balance of earthy matcha and pillowy-soft bread stole my heart instantly. Now, after years of tweaking, I’ve got my own foolproof recipe that brings that same magic to my kitchen. This isn’t just bread; it’s a little green hug in edible form, with the grassy aroma of matcha mingling with sweet dough in the most delicious way possible. And the best part? It’s so simple you’ll wonder why you haven’t been making matcha pan every weekend. Just wait until you see how those vibrant green rolls puff up in the oven – pure joy!
Why You’ll Love This Matcha Pan Recipe
I can’t tell you how many times I’ve made this recipe—it’s my go-to when I want something special without fuss. Here’s why it’s about to become your favorite too:
- Unique flavor that wows: That earthy matcha taste pairs perfectly with just the right amount of sweetness. It’s like your morning latte turned into bread!
- Incredibly soft texture: These rolls stay pillow-soft for days (if they last that long). The secret’s in the kneading technique I’ll show you.
- Foolproof for beginners: No fancy skills needed—just follow my simple steps and you’ll get bakery-quality results.
- Gorgeous natural color: That vibrant green makes every batch Instagram-worthy without any food coloring.
Trust me, once you pull these golden-green beauties from the oven, you’ll understand why I’m obsessed.
Ingredients for Matcha Pan
Gathering the right ingredients makes all the difference with matcha pan. Here’s exactly what you’ll need to create that perfect earthy-sweet flavor and cloud-soft texture:
- 2 cups all-purpose flour – spooned and leveled (no packed flour!)
- 1 tbsp matcha powder – go for ceremonial grade if you can; the flavor sings
- 1/4 cup sugar – I use cane sugar, but regular white works too
- 1 tsp active dry yeast – check the expiration date!
- 1/2 cup warm milk – think baby bottle warm (about 110°F)
- 1 egg – room temp works best
- 2 tbsp butter – softened means you can press a finger in easily
- 1/4 tsp salt – just enough to balance the sweetness
Pro tip: Measure your matcha like you’re paying for it – too much can make your pan bitter!
Equipment You’ll Need
Don’t worry—you probably have everything already! Here’s what I grab when making matcha pan:
- Large mixing bowl (my favorite well-loved ceramic one)
- Wooden spoon or silicone spatula
- Measuring cups and spoons
- Baking sheet (lined with parchment for easy cleanup)
- Clean kitchen towel (for covering the dough)
That’s it! No fancy gadgets needed—just good old-fashioned hands-on baking.
How to Make Matcha Pan
Alright, let’s get our hands dirty—this is where the magic happens! I’ve made this recipe so many times I could do it in my sleep, but I’ll walk you through every step so your matcha pan turns out perfect on the first try.
Preparing the Dough
First, whisk together your dry ingredients—flour, matcha, sugar, yeast, and salt—in a big bowl. This distributes everything evenly so you won’t get bitter matcha pockets later. Now pour in the warm milk (test it on your wrist like baby formula!), crack in the egg, and add that softened butter. Here’s my secret: use your hands! A wooden spoon works, but nothing beats feeling the dough come together under your fingers. Knead for about 8 minutes until it’s smooth as a baby’s cheek—it should feel slightly tacky but not stick to your hands. If it does, add a dusting of flour, but go easy!
First Rise
Shape the dough into a ball and pop it back in the bowl. Cover with a damp kitchen towel (not terrycloth—those leave lint!) and let it rise somewhere warm. My oven with just the light on works perfectly. In about an hour, it should double in size. Don’t rush this—poke it gently; if the indentation stays, it’s ready. If it springs back, give it 15 more minutes.
Shaping and Second Rise
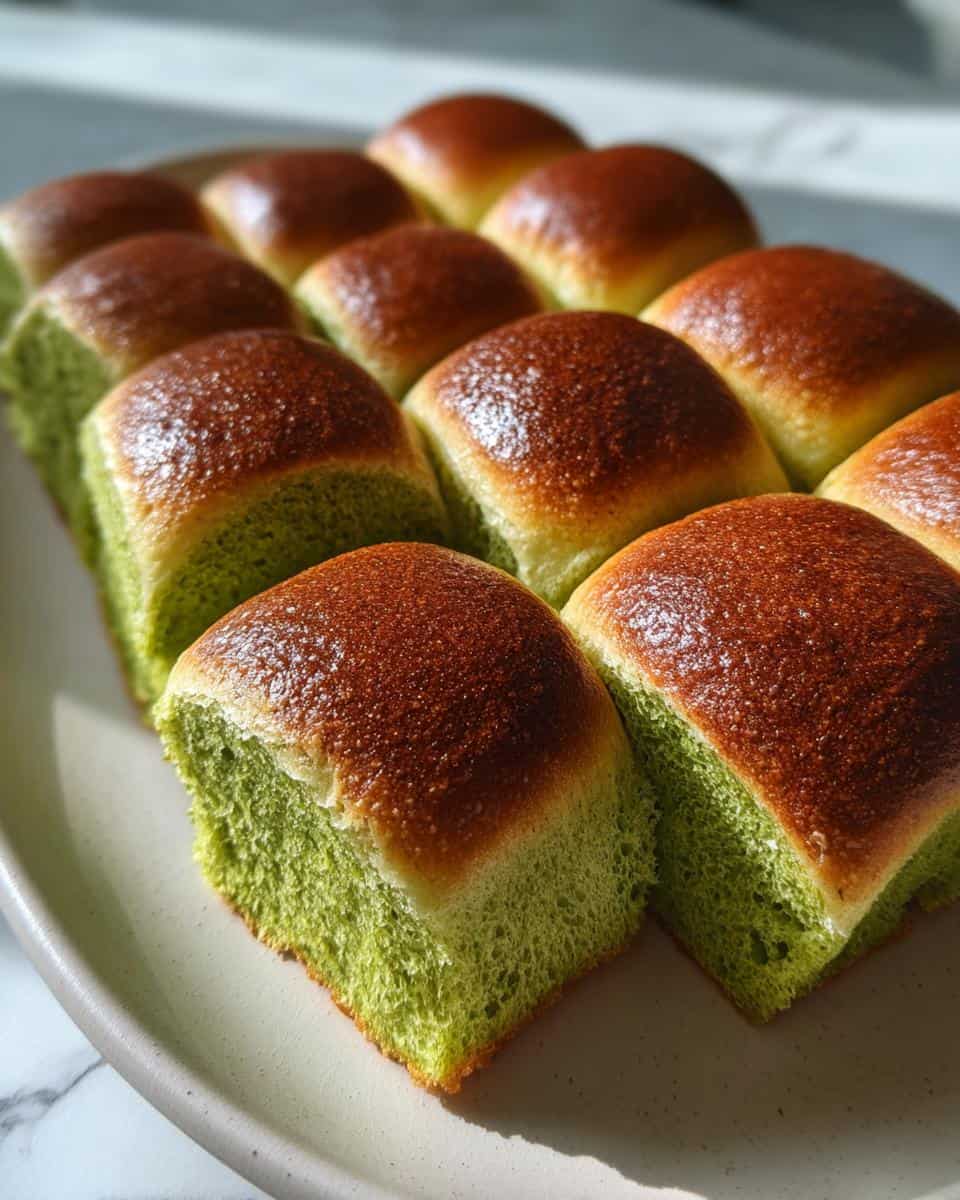
Now the fun part! Punch the dough down (so satisfying) and turn it out onto a lightly floured surface. Divide into 8 equal pieces—I eyeball it, but you can weigh them for precision. Roll each piece into smooth balls by tucking the edges underneath. Arrange them on your lined baking sheet about 2 inches apart. Cover again and let them rise for 30 minutes—they’ll get puffy and adorable.
Baking the Matcha Pan
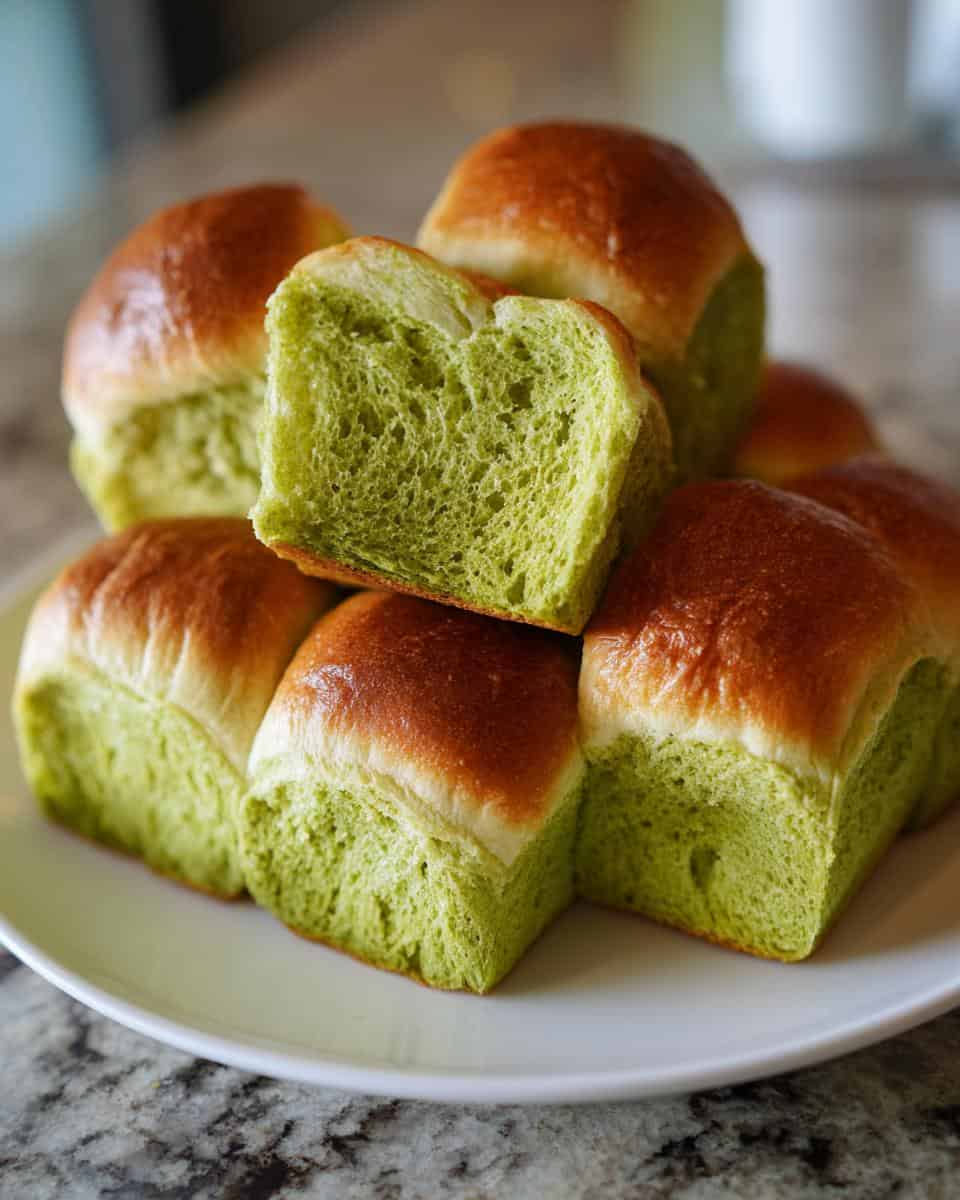
Preheat your oven to 350°F (180°C) while the rolls do their final rise. When they’re ready, slide them in and set a timer for 15 minutes. At 12 minutes, peek—they should be lightly golden on top. If they still look pale, give them another 2-3 minutes. The real test? Tap the bottom—if it sounds hollow, they’re done! Let them cool on a rack for at least 10 minutes (I know, the wait kills me too) before tearing into one.
Tips for Perfect Matcha Pan
After countless batches (and a few hilarious failures), I’ve learned these game-changing tricks for matcha pan that’ll save you from my early mistakes:
- Matcha matters most: Splurge on bright green ceremonial grade—it makes all the difference in flavor and color. Store it in the freezer to keep it fresh!
- Sweetness tweaks: Cut the sugar to 2 tbsp if you prefer earthy notes, or bump to 1/3 cup for dessert-like rolls. Taste your matcha first—some brands are naturally sweeter.
- Dough whispers: If it sticks to your hands while kneading, resist adding too much flour—just oil your palms lightly. The dough should feel like a soft earlobe.
- Color protector: Bake on the middle rack and cover loosely with foil if the tops brown too fast—we want that gorgeous green to shine through!
Remember, even “imperfect” matcha pan still tastes amazing—ask my neighbors who happily eat my “test” batches!
Variations of Matcha Pan
Once you’ve mastered the basic recipe, try these fun twists! I love folding in white chocolate chips for sweet contrast, or black sesame seeds for nutty crunch. My adventurous friend swears by a swirl of red bean paste—just tuck a teaspoon inside each dough ball before shaping. The possibilities are endless!
Serving and Storing Matcha Pan
Nothing beats tearing into a warm matcha pan fresh from the oven—the aroma alone is heavenly! For leftovers (if you have any), store them in an airtight container at room temperature for up to 2 days. They toast up beautifully the next day—just 30 seconds in the toaster brings back that fresh-baked magic. Freeze extras wrapped tightly in foil for up to a month—perfect for sudden matcha cravings!
Matcha Pan Nutritional Information
Here’s the scoop on what’s in these lovely green rolls—but remember, these are estimates! Your exact numbers might dance around a bit depending on your specific ingredients and how big you make your portions.
- Per roll: About 180 calories
- Carbs: 30g (1g fiber)
- Protein: 5g
- Fat: 4g (2g saturated)
- Sugar: 6g
Not bad for something that tastes this indulgent, right? The matcha gives you a nice antioxidant boost too!
Frequently Asked Questions
Over the years, I’ve gotten so many questions about my matcha pan—here are the ones that pop up most often with my tried-and-true answers:
Q1. Can I use regular green tea powder instead of matcha?
Oh honey, no—they’re totally different beasts! Regular green tea powder lacks matcha’s fine texture and vibrant color. Your pan will taste weak and look muddy. Trust me, it’s worth hunting down real matcha (check Asian markets or online) for that signature flavor.
Q2. Why is my dough not rising properly?
First, check your yeast isn’t expired! If it’s fresh, your milk might’ve been too hot (it kills the yeast) or too cold (it won’t wake up). The sweet spot? Around 110°F—warm like bathwater. Also, drafts can slow rising—try putting the bowl in your oven with just the light on.
Q3. Can I make matcha pan without eggs?
Absolutely! Swap the egg for 1/4 cup applesauce or mashed banana. The texture changes slightly—more dense but still delicious. My vegan friend swears by flax eggs too (1 tbsp ground flax + 3 tbsp water).
Q4. My matcha pan turned out bitter—what went wrong?
You probably used too much matcha or a culinary grade that’s stronger. Next time, taste your matcha first—some brands pack more punch! Also, overbaking can bring out bitterness, so set that timer!
Q5. Can I use instant yeast instead of active dry?
Yes! Use the same amount but skip the first proofing—just mix it right in with the dry ingredients. The rising times might be slightly shorter, so keep an eye on your dough.
Share Your Matcha Pan Experience
I’d love to hear how your matcha pan turns out—did you stick to the classic recipe or try a fun variation? Drop me a comment below with your baking adventures (and photos if you’ve got ’em)! Nothing makes me happier than seeing others fall in love with this recipe too.
Print
Irresistible Matcha Pan Recipe in Just 8 Steps
- Total Time: 1 hr 40 mins
- Yield: 8 rolls 1x
- Diet: Vegetarian
Description
A simple and refreshing matcha pan recipe that combines the earthy flavor of matcha with soft bread.
Ingredients
- 2 cups all-purpose flour
- 1 tbsp matcha powder
- 1/4 cup sugar
- 1 tsp active dry yeast
- 1/2 cup warm milk
- 1 egg
- 2 tbsp butter, softened
- 1/4 tsp salt
Instructions
- In a bowl, mix flour, matcha powder, sugar, yeast, and salt.
- Add warm milk, egg, and butter. Knead into a smooth dough.
- Let the dough rise for 1 hour or until doubled in size.
- Punch down the dough and shape it into small rolls.
- Place on a baking sheet and let rise for another 30 minutes.
- Bake at 350°F (180°C) for 15-20 minutes.
- Cool before serving.
Notes
- Use high-quality matcha for best flavor.
- Dough should be soft but not sticky.
- Adjust sugar based on preference.
- Prep Time: 20 mins
- Cook Time: 20 mins
- Category: Bread
- Method: Baking
- Cuisine: Japanese
Nutrition
- Serving Size: 1 roll
- Calories: 180
- Sugar: 6g
- Sodium: 85mg
- Fat: 4g
- Saturated Fat: 2g
- Unsaturated Fat: 1g
- Trans Fat: 0g
- Carbohydrates: 30g
- Fiber: 1g
- Protein: 5g
- Cholesterol: 30mg
